Newsletters
ampsuite allows you to set up automated newsletters based on your latest releases and articles, or you can create custom newsletters using your own HTML and send them out to your mailing lists via ampsuite. For information on setting up mailing lists see the mailing lists section of the user guide.
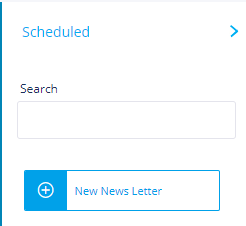
The first tab of the news letters page Scheduled (shown left) shows any news letters you have set up that are still to go out. This includes both one off news letters with a future send date, as well as any recurring newsletters.
You can edit any scheduled newsletter by clicking on it within the list. The options available when editing a scheduled newsletter are largely the same as when creating a new one, which is covered here.
Creating a Newsletter
To create a new newsletter click the New Newsletter button on the left. A new form will open as shown below:
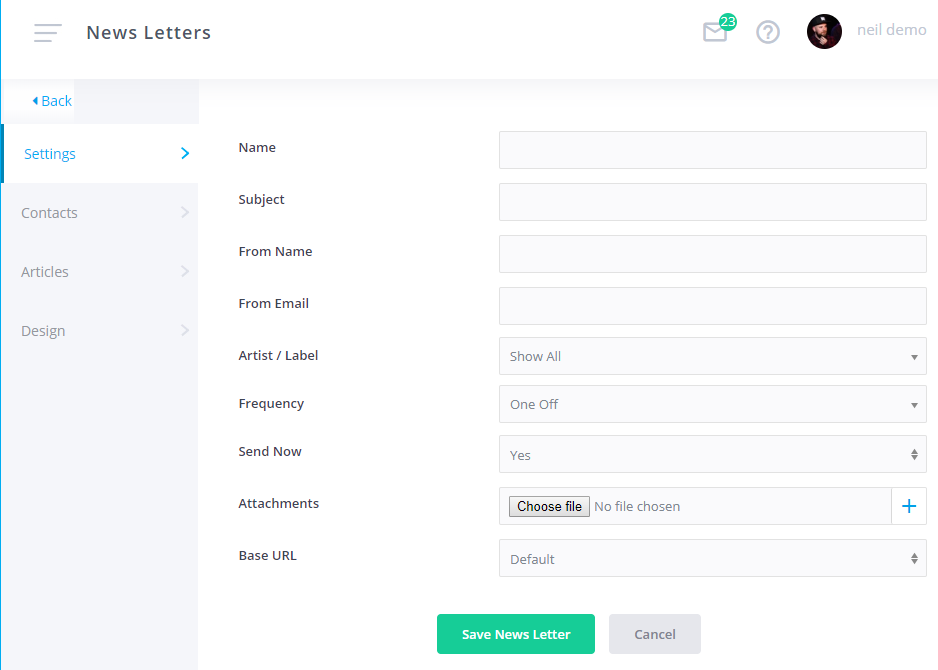
The first tab Settings contains the following options:
- Name - Give your news letter a unique name you can identify it by, this is only shown within ampsuite.
- Subject - The subject of the outgoing email as displayed to fans
- From Name - The name that the email will appear as being sent from
- From Email - The email that the email will appear as being sent from
- Artist / Label - You can restrict any releases shown within a news letter to a particular artist of label, the default is to show all
- Frequency - You can either send a one off newsletter, or create an automated one which will be sent either every week or once a month. If you select the weekly or monthly option you can select which day of the week the letter will go out on. For monthly letters this is always the first week within the month. by default automated news letters go out at around 5pm GMT - if you would like us to change this on your system please contact us
- Send Now - For one off newsletters you can choose to either send it as soon as you save it, or schedule it for a particular date and time. Note that emails will be sent in batches and the time set is when the letter will begin sending, not everyone will receive it right away, depending on the volume of contacts you have chosen to send it too.
- Attachments - You can add attachments (for example a press release) to your email if you wish.
- Base URL - by 'Default' links to any articles within the newsletter will take the reader to a page on ampsuite where they can read the full story. If you have an ampsuite powered website this can be changed to your own website, leave this on 'Default' unless you have an ampsuite powered website and have discussed using this feature with us.
Newsletter Contacts
The second tab within the new newsletter form is Contacts, here you can select what you want the news letter to be sent to. You can select both individual contacts or entire mailing lists. In both cases these must have been set up under the contacts and mailing lists sections prior to being able to add them.
To select which contacts to send to click the Edit Contacts button on the left, a list of all available contacts and mailing lists will be displayed on the right (they are displayed together, with mailing lists shown at the top). Select which mailing lists / contacts to add by clicking the blue checkbox to the left of their name / email, it will change to a blue tick to show they have been selected. You can use the search filter on the left to find particular contacts or lists, don't worry any you have already selected will be remembered even if they aren't shown due to the current filter settings. See the video below to see how this works:
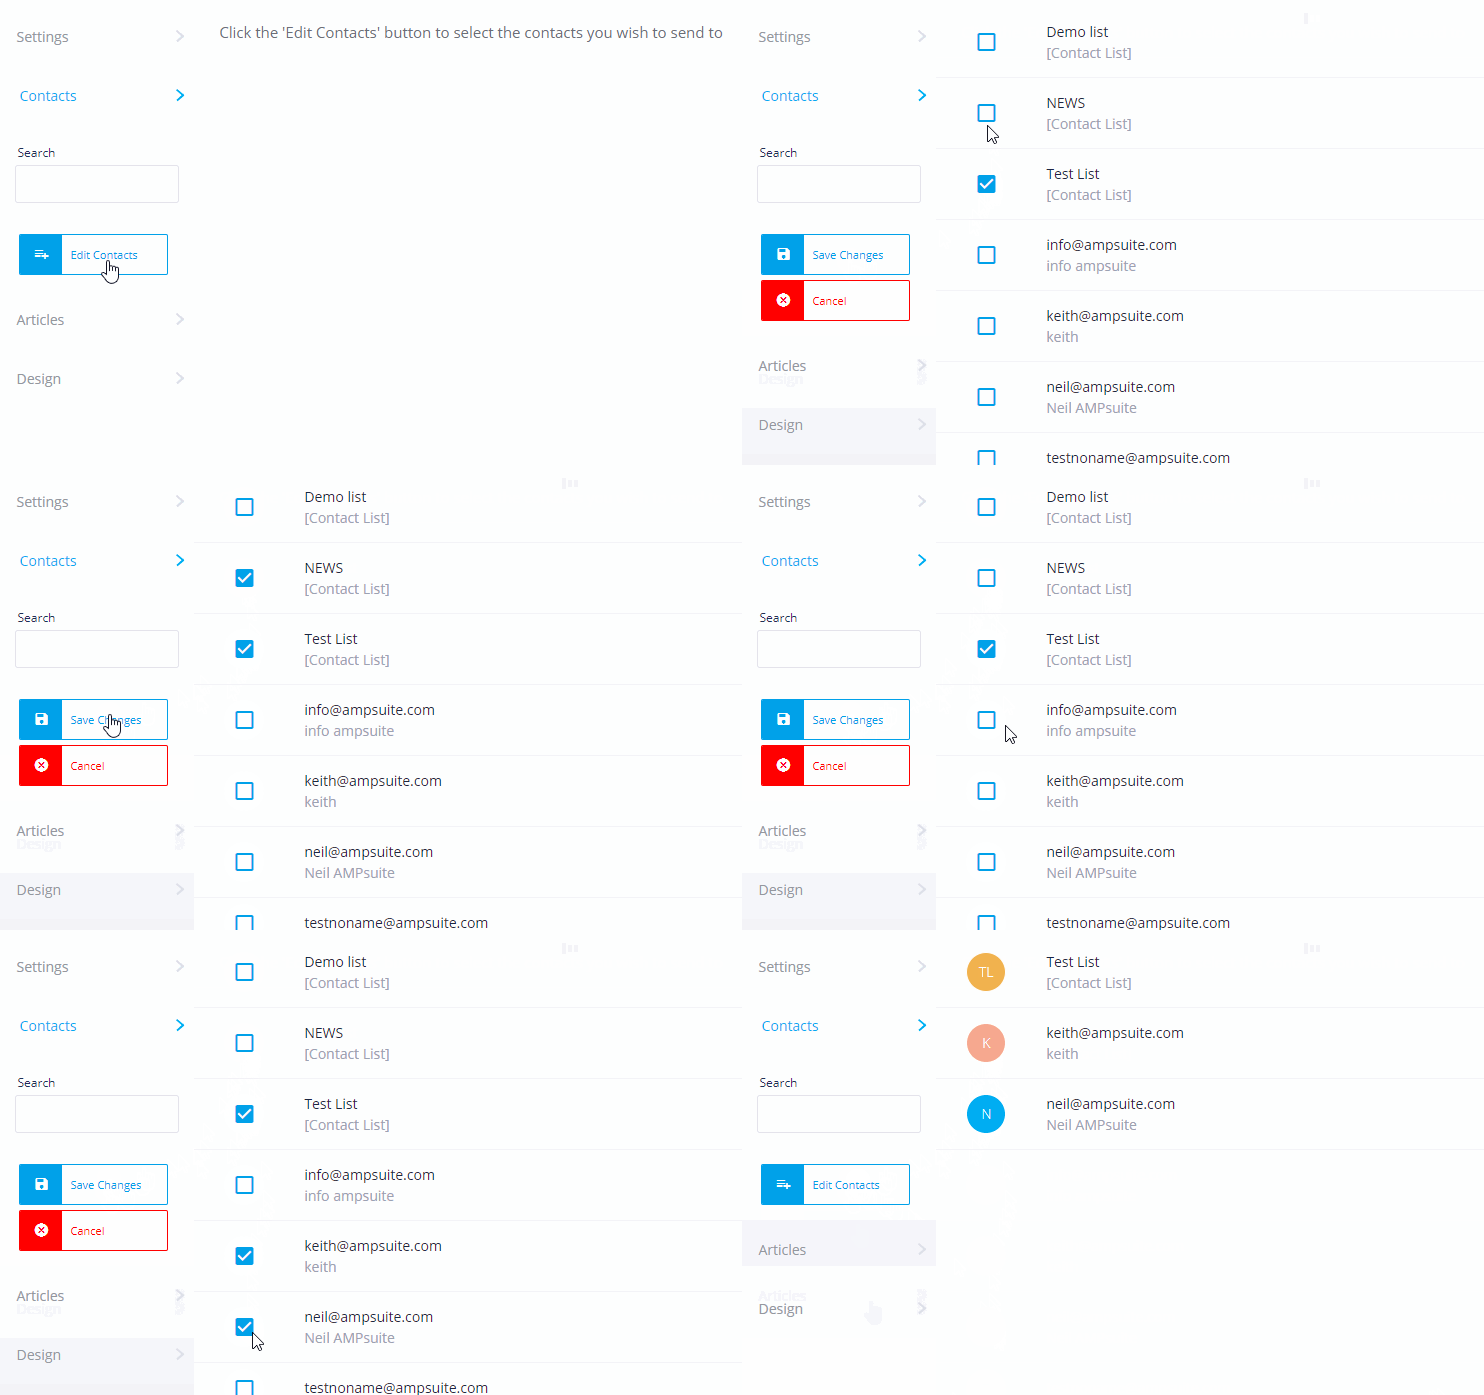
Once you are happy with the contacts you have selected click the Save Changes button. If you wish to abandon any changes you have just made and revert to the last saved selection click Cancel.
Articles
The third tab on this form is the articles tab. You can add any number of articles to a newsletter (or none at all). These articles are unique to this newsletter and in the case of recurring newsletters will be removed after they have been sent once. To add a new article click the Add article button on the left - you will need to enter a title, a link (where the user will be redirected to if they click on the article), upload an image, and enter the text of the article in the Content box. Note that images will be resized to fit and may vary depending on how many columns you include in your letter. Do not upload images that are too large as they will take a long time to load within the email, but large enough so as not to be of a poor quality. You can preview how your articles look in the Design stage described below before sending.
Design
The final tab on this form is the Design tab - where you can preview and customise how your newsletter will look. You can either do a custom design for this newsletter, or use one of your pre saved templates - creating pre saved templates is covered further down in this help guide.
On the left column under the Design tab you will see a Template dropdown, you can select one of your pre saved templates from here and it will be loaded in to the designer for further customization if you wish. Note loading a template will lose any unsaved changes to the current design.
Below the template selection box you will see a number of sections, which represent the sections of your newsletters, a preview of the newsletter as it will appear in people's inboxes is shown on the right. You will notice that the sections listed in the left column match up to the sections shown in the preview on the right, you can drag and drop sections on the left to change their order within the newsletter - the preview will then update to reflect this (see video below where we reorder the 'Other Releases' section to move it underneath the 'Header' section):
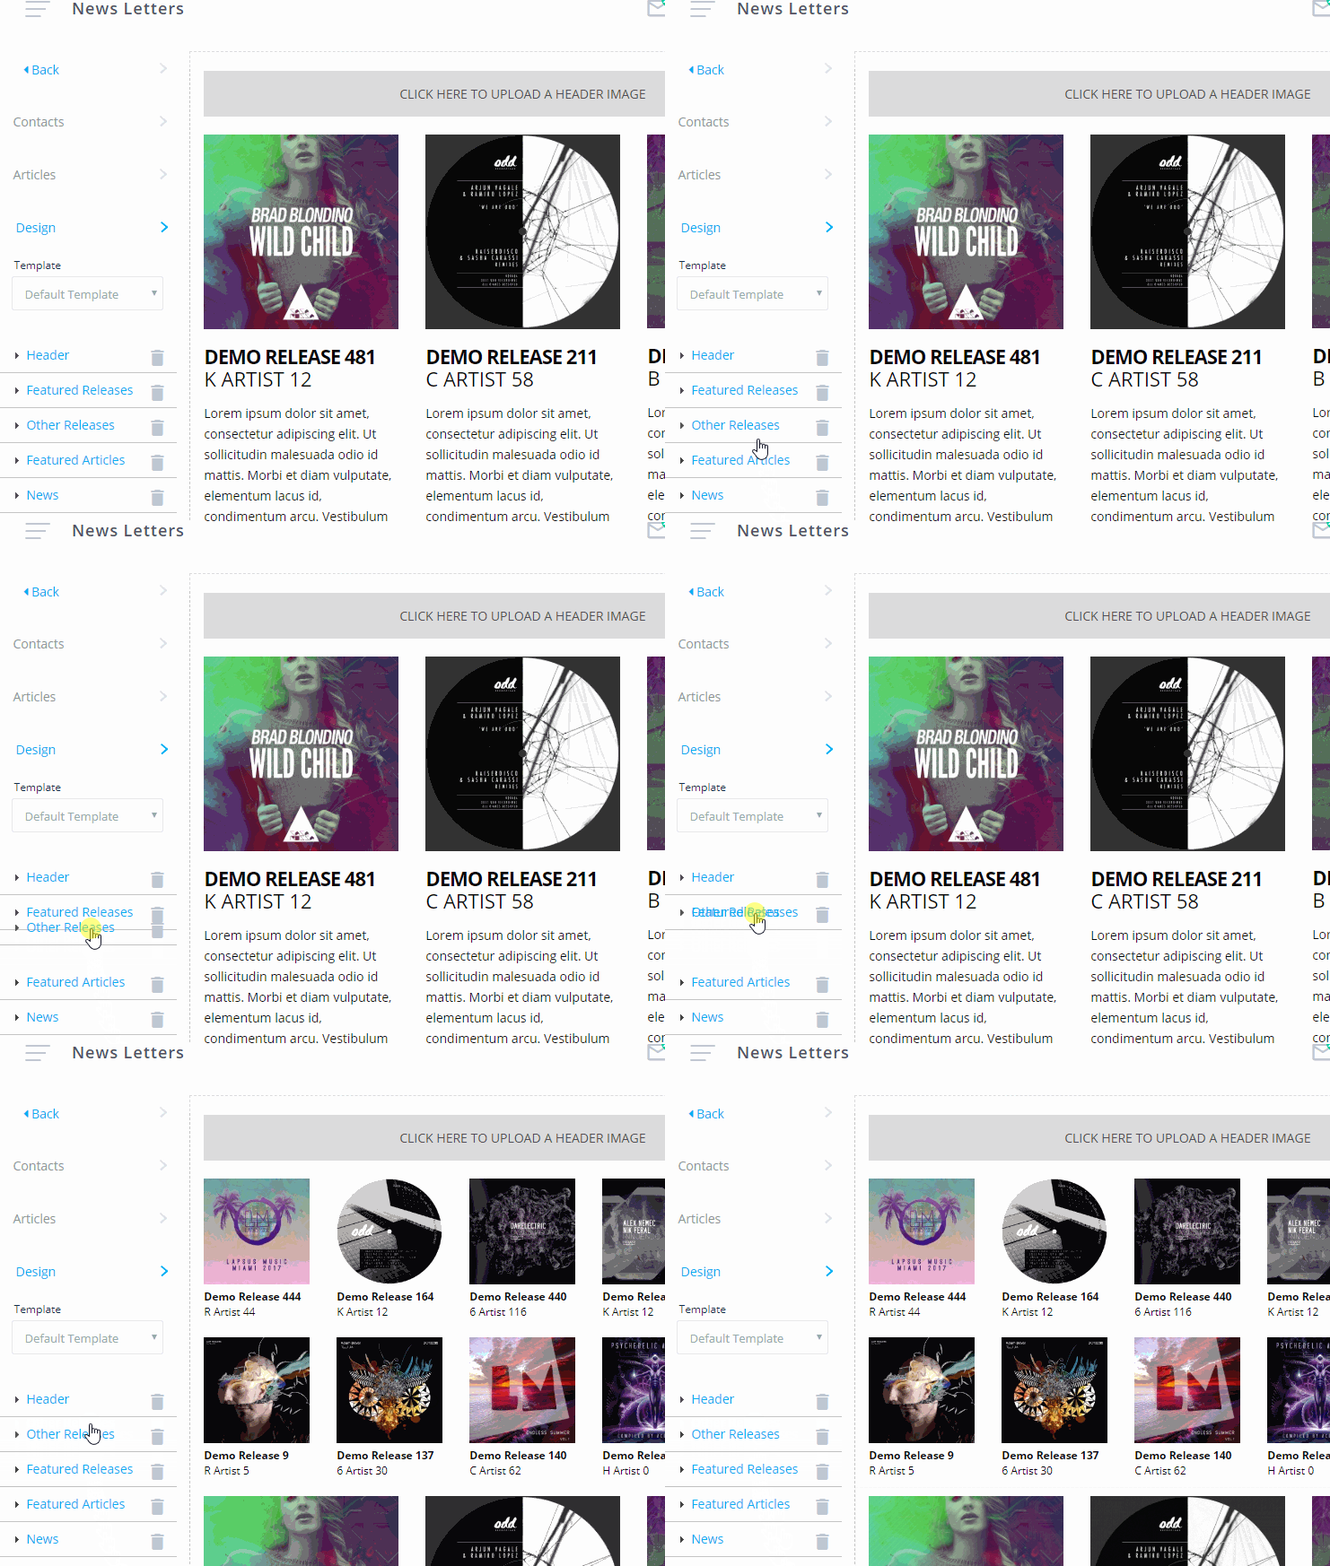
You can completely remove a section from the newsletter by clicking on the trash can icon next to it in the left hand list (also shown in the video above).
You can add new sections to the newsletter by clicking the Add Section button at the bottom of the left hand column (you may need to scroll to see it). Sections available in the news letter are detailed below, note that some sections, such as the header, articles and releases can only feature once within a letter, and won't be shown in the list to add if already present. Other 'Custom' sections can be added multiple times.
- Header - Click on the header section within the preview on the right to select an image to upload
- Featured Articles - This section displays any articles you have added, as described above. You can alter how many are shown by selecting the number of rows and columns see below for more info)
- Featured Releases - These are the latest releases due for release this week. You can alter how many are shown by selecting the number of rows and columns
- News - These news stories are pulled in from the news stories feed, and unlike articles will not be removed after sending
- Other Releases - A larger selection of releases with release dates after those already shown in the 'Featured Releases' section - these just show the artwork, title and artist
- Custom HTML - You can enter any custom HTML you want in these sections, bear in mind that many email clients cannot handle complex HTML / CSS and we advise sending any emails using custom HTML to yourself first to make sure they look correct in the most frequently used email clients (e.g. Gmail, Hotmail, Apple Mail, Outlook etc.)
- Image - Upload an image of your choosing, in either jpg or png format
- Text - Add a custom text section, HTML will not work here
You can add as many or as few sections as you wish, for example if you want to design your own HTML email from scratch simply delete all of the default sections, and add a single 'Custom HTML' section to your email and cut and paste your predesigned HTML in to it.
Some sections, such as articles and releases, allow you to alter how many rows and columns they should be displayed in. To alter this for a section click on it within the left hand list - you can use the sliders to increase or decrease the number of rows / columns. Note that changes will be reflected in the preview on the right but there may be a slight delay while the preview updates. The video below shows the number or rows and columns being edited on the 'Other Releases' section.
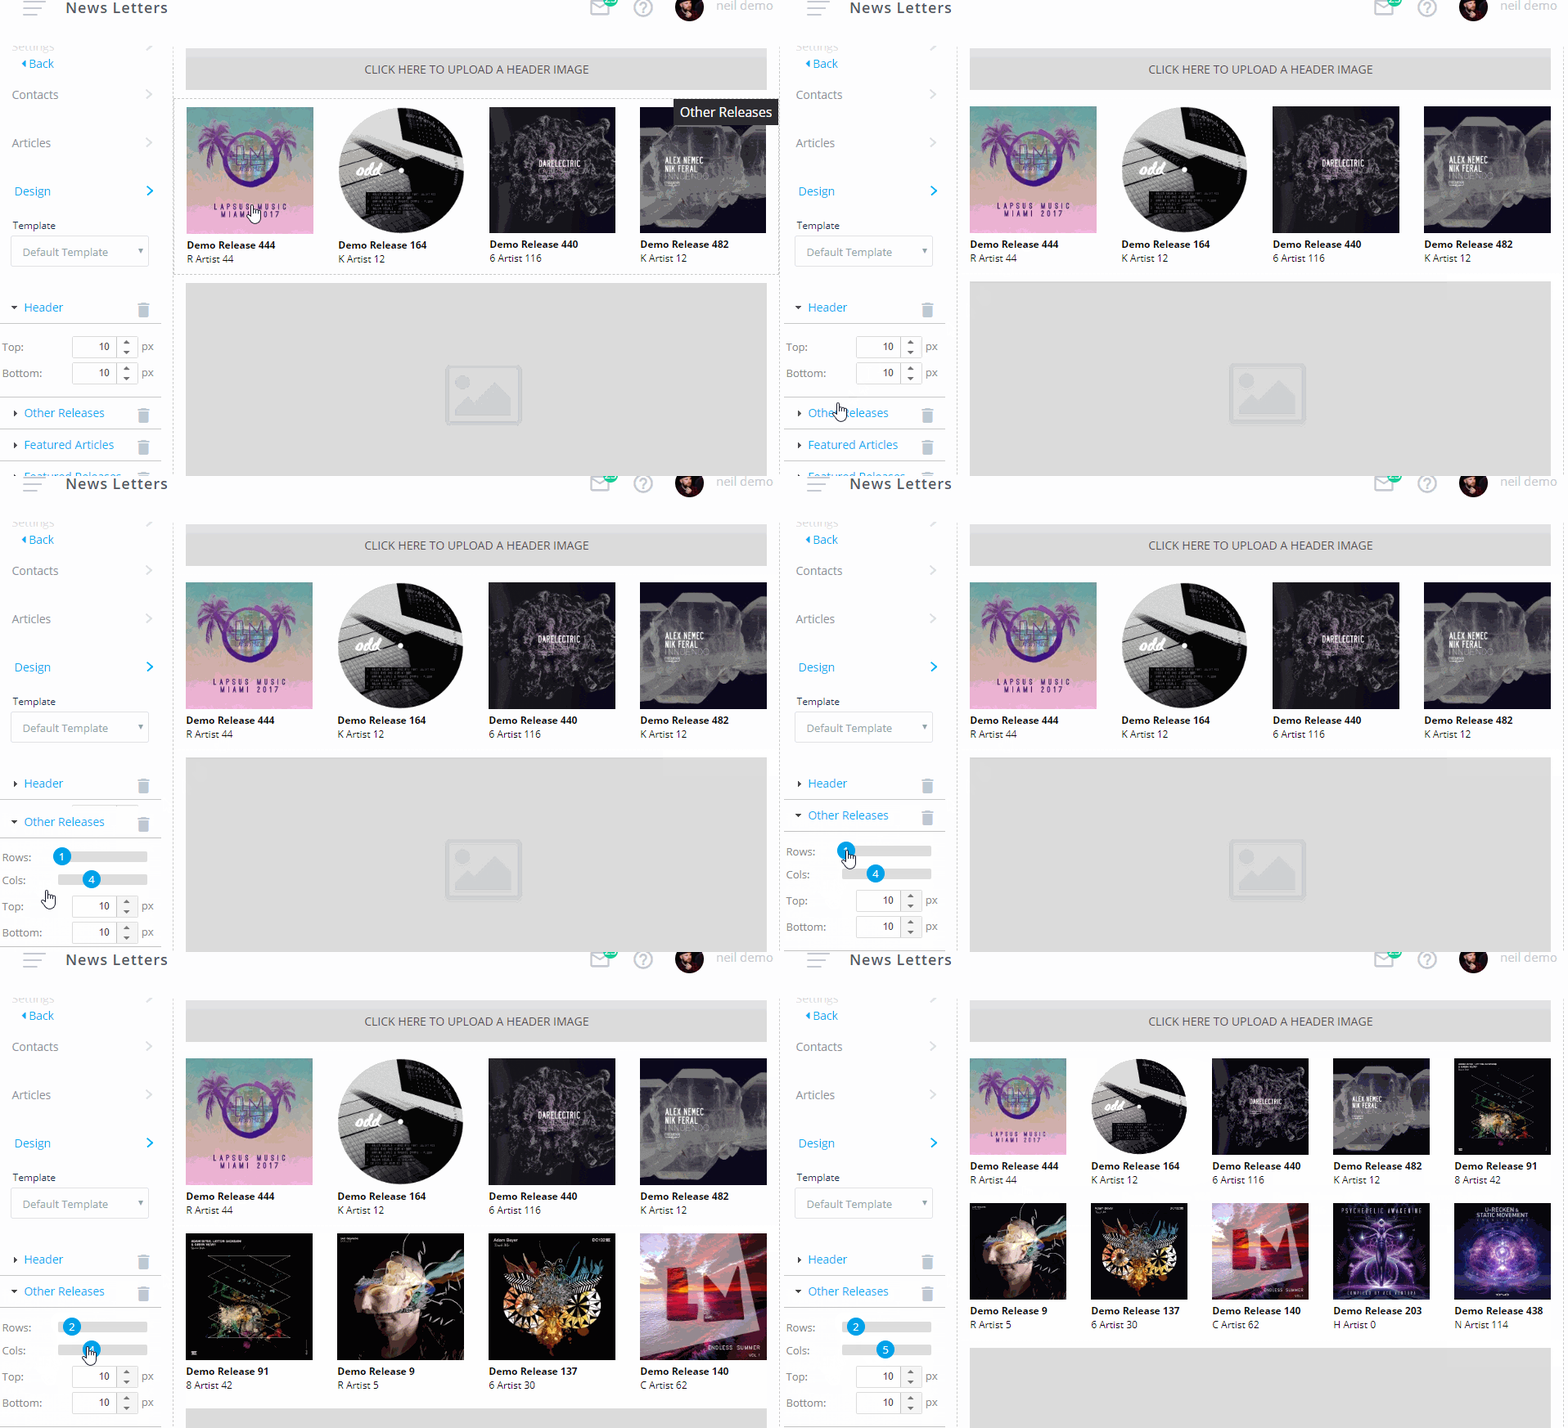
Depending on the type of section you may also be able to edit things in a similar way, such as margins or font sizes and colours.
Within the right hand preview hovering over a section highlights it and displays the name of that section in the top right corner. For custom HTML, image and text sections simply click on the section to edit its content. When you are happy with the content click Save to view your changes, note there may be a slight delay while the preview updates to reflect your changes.
Sending Your Newsletter
When you are happy with your newsletter go back to the Settings tab and click the Save Newsletter button at the bottom. Depending on what you have selected the newsletter will either be sent straight away, or scheduled for sending on your chosen date.
Sent / Stats
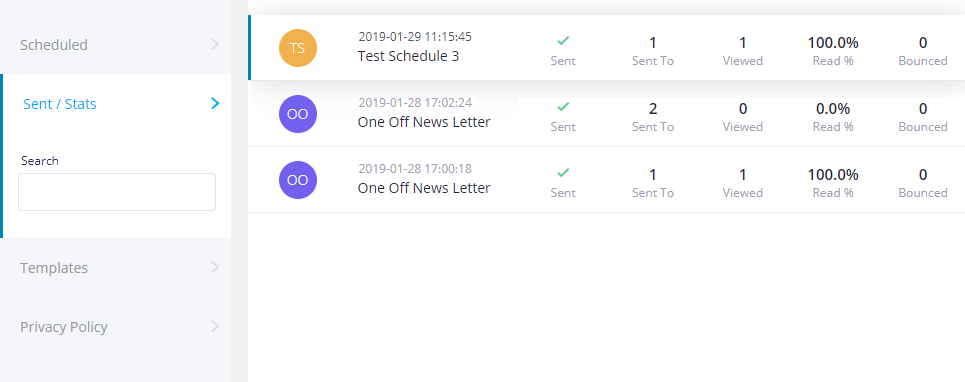
Going back to the first set of tabs on the news letters screen, click the 2nd tab titled Sent / Stats - here you will see a list of newsletters that have already been sent out, along with useful stats such as the read rate and number of bounce backs.
 f
f
Clicking on one of the news letters listed here will take you to a full list of all contacts the letter was sent to, along with indicators to show if they have opted in, read the email, or if it bounced back.
Templates
The third tab Templates allows you to pre design newsletters and then use these designs later in actual mailouts. This may be useful if you wish to make predefined designs for particular artists or labels that you will reuse multiple times. To edit an existing template simply click on it within the list on the right, or click the New Template button to create a new one.
The designer works in exactly the same way as in the Design tab of an actual news letter which was covered above, so we will not repeat that here. To save your design click the Save Design button at the bottom right of the screen. If you are working on an existing template you will be given the option to either overwrite it with your changes or create a new template, while still keeping the original version.
Privacy Policy
By default when you first send a new contact a newsletter, they will receive an opt-in email, asking them to consent to receive mail outs, and agreeing to the default ampsuite data protection and privacy policy.
If you wish to add your own text to this email you can do so from the Privacy Policy tab on this page. Note that any text you enter here will be shown in addition to the default ampsuite privacy policy email, it will not replace it.
If you have updated your privacy policy and need to regain consent to the new policy from existing contacts, set the Resend to Contacts? option to yes - note this will effectively set all contacts back to being opted out from mail outs, until they agree to the new policy.
Click the Update Policy button at the bottom of the page to save any changes you have made.