Mailing List Contacts
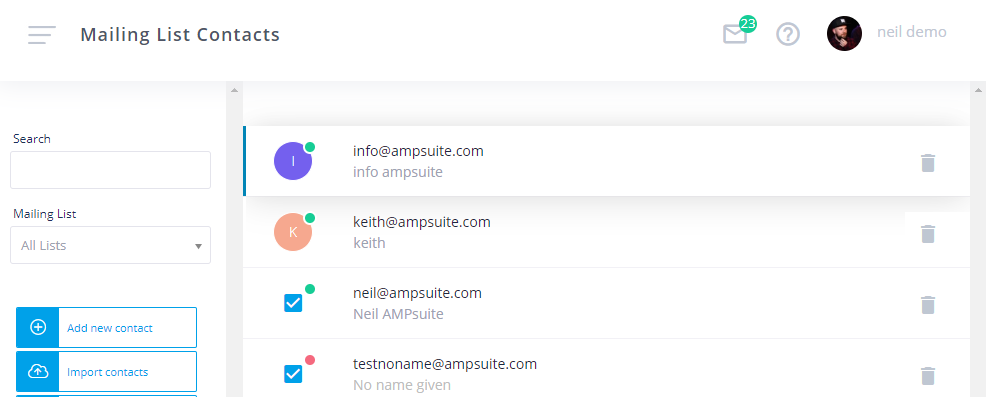
Click the Contacts link from the Mailing List section of the main menu to access a full list of all contacts currently in your fan mailing list. On the left hand side of the screen you will see a number of options for adding, editing and organising your mailing list contacts, these will all be explained in the following section.
Add New Contact
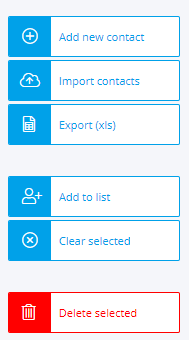
You can add individual contacts manually by clicking the Add new contact button. A form will open to enter their details, at a minimum you must enter a valid email address, and select which mailing list they should be added to. Once you have entered all of the required data click Save Contact and your new contact will be added to the list.
To make changes to an existing contact simply click on their name / email address from within the main list on the right hand side of the page, the same form will open as described above for adding a new contact.
Import Contacts
If you wish to add a large number of contacts, or move contacts over from an existing system, it may be better to use the Import contacts option. On clicking this button a new form will open. Contacts must be uploaded in the predefined format - you can download an example of this format by clicking the link to the sample file at the top of the form.
The headings must appear exactly as in this sample file, and at a minimum you should enter the contacts Email Address, all other fields are optional and can be left blank. Once you have completed your file - click the 'Select File' button to find it on your computer and upload it to ampsuite. You can select which mailing list to add the contacts too using the Mailing List dropdown underneath the file selection box. You must create a mailing list to add the contacts to prior to uploading the file.
IMPORTANT: Make sure any lists you import and clean and up to date, have been removed of any old / inactive contacts, and only contain the details of people who are interested in receiving emails from you. Opt-in emails will be sent to any new contacts when you first try to send them a newsletter, and a high volume of failed deliveries can negatively impact delivery rates of any future emails you might try to send.
TIP: You can re import contacts that already exist within ampsuite, these will be matched based on the email address in the file, and any additional details in the new import will be added to the existing contact. This can also be used to bulk add contacts to a new list, by uploading a file with the existing contacts you wish to add, and selecting the list to add them to from the Mailing List dropdown on the import.
Export (xls)
You can export all contacts currently in your system and download them as an excel file. This may be useful for making bulk changes to your contacts, which can then be reimported into ampsuite.
Add to list
You can add multiple contacts at a time by hovering over them in the list, and clicking the blue checkbox that appears to the left of their name/email. Once you have ticked all the contacts you wish to add, click the Add to list button. You can then select one of your existing lists from the dropdown to add them to. Click the Add Contacts button to add the selected contacts to your chosen list.
You can clear / untick any currently selected contacts by clicking the Clear Selected button.
Deleting Contacts
You can delete a single contact by clicking the trash can icon to the right of their name/email in the main list. If you wish to delete multiple contacts hover over and click the checkbox that appears to select them - and then click the Delete selected button.
Opt In Consent
ampsuite works on an opt-in consent system, whereby any new contacts will receive an opt-in email the first time you try to send them a newsletter. If the user does not click to confirm they give consent by clicking on the link in this email, they will not receive any further emails you try to send them.
This email will contain the standard ampsuite out in email text, along with a link to our own data protection and privacy policy. Additionally you can add your own text to this email to cover any additional ways you may wish to use your contacts data from the Privacy Policy tab of the main News Letters page - for more info see the 'Privacy Policy' section of the News Letters help guide section by clicking here.
A contacts opt-in status is indicated by the small green or red dot indicator at the top right of their initials within the main list of contacts.
Note that due to data protection and electronic marketing laws, including GDPR within the EU, it is not possible to resend opt-in emails, or send further emails to contacts who have not opted in using the initial opt-in link. This also helps to prevent spam and misuse which may negatively affect delivery rates of future emails sent via the system.
You should always make sure you only add contacts and send emails to people who you think will be interested in receiving them, and must remove anyone from your contact list if they request you to do so.
You can see a list of contacts who have chosen to actively remove themselves from your list on the Bounced / Unsubscribed page - note that this does not include contacts who chose to just ignore the opt in email completely.