YouTube / SoundCloud Uploads
ampsuite is able to generate and upload samples of your products to your YouTube and SoundCloud accounts.
Each upload can make use of a set of default settings for time-saving uploads, or be customised individually to create unique listening-post uploads for your listeners on these two popular streaming music services.
This user guide will walk you through the steps required to create simple YouTube and SoundCloud uploads for your releases.
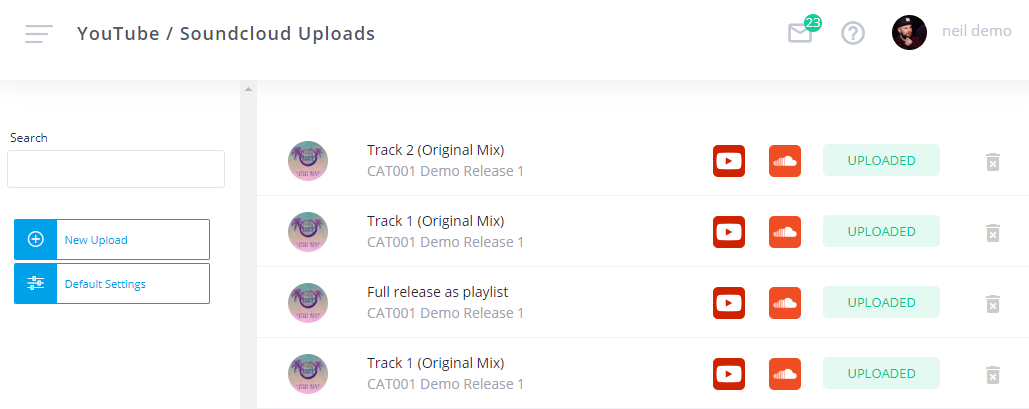
To avoid issues please make sure that the email address on your Soundcloud account is verified and that you have enough space available on your Soundcloud account prior to uploading. This can be done by logging in to your Soundcloud account.
It is also important the track lengths have been correctly entered for every track on the release as the uploader requires these to produce variable length video and audio clips for uploads.
Default Settings
To help speed up the process of getting your products uploaded and on to YouTube and SoundCloud, ampsuite allows you to predefine a set of Default settings for every upload.
By appropriately setting your defaults before you create your uploads, you will save a lot of time by enabling ampsuite to populate your uploads with descriptions and tags from the metadata you have already provided when initially creating your product releases.
You can create multiple settings for different channels - and even assign a default set of settings based on which label the release is on.
To create or edit a set of default settings click the Default Settings button in the left column of the page.
Meta Data
The meta data and video creation forms and similar for both creating a default set of settings and an individual upload, so we will only go over them once here.
The first tab 'Metadata / Audio Settings' applies to both YouTube and Soundcloud uploads - and is shown in the screenshot below:
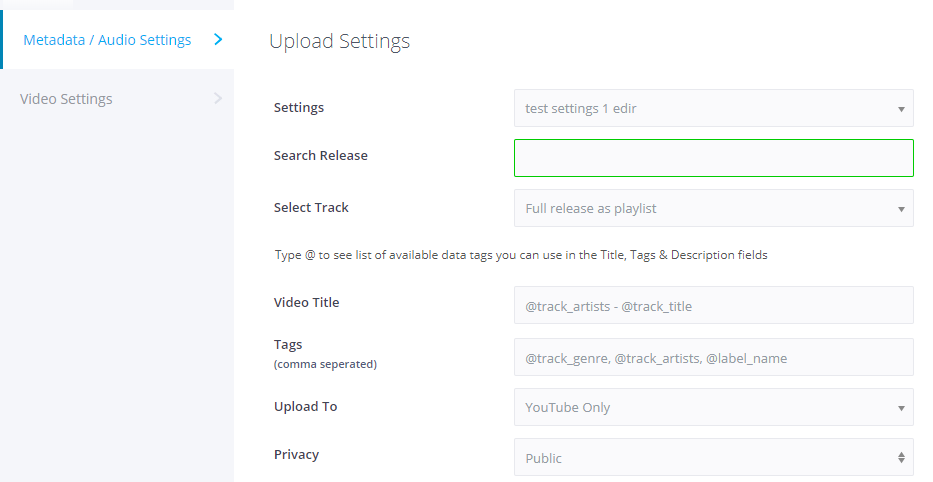
If you are editing default settings, the first dropdown allows you to either 'Create New Settings' or you can change it to select and edit an existing set of settings. When editing previously saved settings, you will see additional buttons at the bottom of the form to either Update the existing settings, create a new Copy of the settings (keeping the existing one as is) or to Delete the currently selected settings.
When creating a new upload you can select one of the existing default settings to prepopulate the form (you can also then edit them for this particular upload). You must also search for the release you need to upload, and can then select to either upload the entire release as a playlist, or just one individual track from the release.
Other important metadata settings are explained below:
NOTE: At any time, type "@" within any one of these text boxes for a pop-up list of the available data tags, which can be used to pull in existing metadata from the release.
- Title - This field allows you to enter the title for each upload, we suggest the data tags '@track_artist' and '@track_title', separated by a hyphen.
- Tags (comma separated) - You can enter tags separated by commas for your uploads in this field which will be applied to both your YouTube and SoundCloud uploads. Both plain text tags or ampsuite's data tags will work here. We suggest using '@track_genre, @track_artists, @label_name, @copyright, @cat_no, @general_release_date' as this will apply tags to your uploads with the tracks genre, performing artists, label name, the copyright line, catalogue number as well as the general release date.
- Upload To - You can either upload to just YouTube or Soundcloud, or both at the same time using the same settings.
- Privacy - You can chose to upload to both YouTube and Soundcloud in 'private' meaning it cannot be found by the public - this is useful if you wish to upload releases in advance of the release date, you can then set them to 'public' on the day of release from your YouTube and/or Soundcloud account.
- Fade In / Out (secs) - These fields allow you to set the default length of your videos / audio clips in a dynamic way.
- Fade In Start - This is the point within the audio at which the clip will start e.g. 00:00:30 means the clip will start from 30 seconds in to each track
- Fade In End - Used together with Fade In Start you can select the length of volume fade in at the start of the video, e.g. if 'Fade In Start' is set to 00:00:30 then setting 'Fade In End' to 00:00:40 will result in a 10 second fade in at the start of the video, starting 30 seconds in to the track. Note that the end point is relative to the original track, not to the fade in start point.
- Fade Out Start - This is the point within the audio at which the clip will begin to fade out, note that this is relative to the original track, not to the fade in start point.
- Fade Out End - This is the point in the audio at which the clip will end, e.g. if 'Fade Out Start' is set to 00:01:00 then setting 'Fade Out End' to 00:01:10 will result in a 10 second fade out at the end of the video, starting 1 minute in to the track, and finishing at the 1:10 point. Note that the end point is relative to the original track, not to the fade in start point.
TOP TIP: Fade Out Start / End can be set to negative values, to indicate the time from the end of the original audio clip. e.g. setting 'Fade Out Start' to -00:00:30 and 'Fade Out End' to -00:00:20 will result in a 10 second fade out starting 30 seconds before the end of the original audio. Leaving both Fade Out Start and Fade Out End to 00:00:00 means the clip will play to the end of the original audio track.
- Description - How you fill in this Description field is entirely up to you. You may wish to include the @release_description tag to pull in your sales description from each release, as well as the @exclusive_release_date or the @general_release_date, or links to purchase the release.
Video Settings
The uploader allows you to quickly create simple videos by combining the release cover art, background images and existing video clips into a single video over which the tracks audio will be played. These settings only apply to YouTube uploads. Click the Video Settings tab to open up the form shown below:
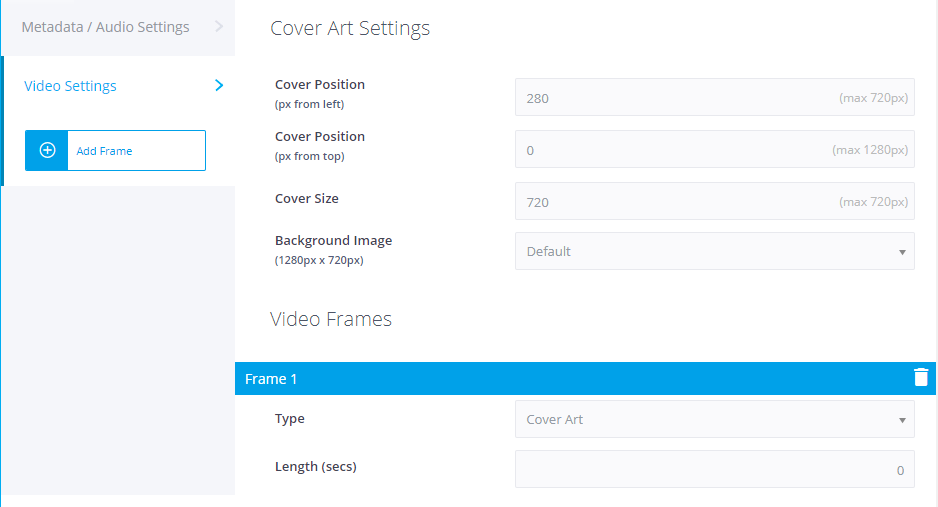
Video clips are generated in 720p HD format, with dimensions of 1280px wide and 720px high - bear this in mind when selecting values for the cover size and positions mentioned below, as well as when uploading images and video clips.
Cover Size, Cover Position
Use these options to change the size and position of the cover art within the video frame. Note that you do not have to include the cover art in every video, this is controlled by changing the Frames within the video (see below).
Background Image
Select 'New' to upload a background image which will be used in your YouTube upload to sit beneath the product cover art. If no background image is selected the cover art will appear on a black background.
Editing Frames
Each video is made up of one or more 'frames'. A frame can either be the release cover art (and background image), a static image, or a video clip. By combining a number of frames within a single video it is possible to create more complex videos containing intros and outros.
By default each video is a single frame containing the release cover art and background image. To add a new frame click the + button to the right of the blue Default Frames heading.
A frame can either contain the release cover art, or a custom upload (either an image of video clip). You can change between the two by selecting either Cover Art or Upload from the radio boxes for the frame. If you select Upload a button will appear to select your image or video clip from your computer. There is also a checkbox labelled 'contains audio' - this should only be ticked if you are using a video clip which contains its own audio which you wish to be played before/after the track audio. Otherwise the track's audio will play over the frame.
You must enter the length in seconds of each frame. One frame must have a length of 0 seconds - this is the frame which will fill the remaining time of the video. For example if you have a track/video which is 60 seconds long you may have the following 3 frames:
- Frame 1 - Video Intro (5 seconds)
- Frame 2 - Cover Art ('0' seconds - this will actually last for 50 seconds)
- Frame 3 - Outro Image (5 seconds)
Creating your video
To start a new upload click the New Upload button shown in the left hand column of the screen.
This screen will seem rather familiar if you have just set your defaults! Much of this screen has been detailed in the above section, except that this time the settings apply to an individual upload.
You can use the 'Search Release' field to search your ampsuite account for a release (it doesn't have to have been set to Final to upload). Once selected, you can use the 'Select Track' drop-down box to choose which track from that product you would like to generate an upload for, or choose 'Full release as playlist' to upload all recordings from the product with the same settings.
From this 'Create Video' screen, many of the settings that you set in the defaults, but you can change them here unique to this upload - your changes here won't be saved as default. This is useful if you need to describe or tag this release differently from others.
Once you are happy with the settings, press the 'Create Video' button to begin generating your uploads.
Authorising your upload
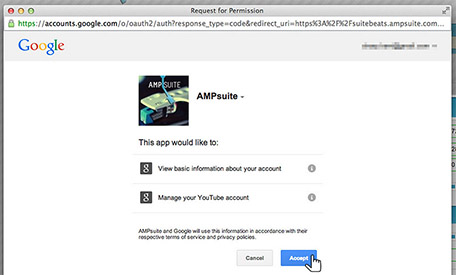
Upon hitting the 'Create Video' button, a pop-up window will open, if it does not, you may need to confirm to your internet browser that you wish to accept pop-up windows from ampsuite. For further information on how to enable pop-ups in your browser, please see the following guides (links open in a new tab/window): Google Chrome, Mozilla Firefox, Internet Explorer, Safari.
Depending on whether you set this upload to go through to YouTube, SoundCloud, or both, new windows will pop-up which require you to give permission to ampsuite to upload the generated content to your accounts (pictured). If you are not already logged in, you will be given the opportunity to log in and give ampsuite access to upload your content.
Of course, you can upload content from ampsuite to any number of accounts that you have access to. Simply log in to your alternative accounts while repeating this process.