Digital Contracting
You can use the contract module to sign recordings from current or new artists or third-parties digitally and paper-free with no complicated scanning and returning, time consuming customs forms or postage stamps to worry about.
Sticking true to ampsuite's methodology, the contract module also works in conjunction with the other modules available to you through the system. Creating product listings, accounting royalties to your Licensors and updating your Artist details are now made easier through the use of the contract module.
A Licensor can be any person or party which you are required to, or wish to provide a share of royalties to from the sale of your products. For example, a performing artist who you wish to sign to release their music, a third-party label who you wish to license recordings from for use on compilations or bundles, a featured vocalist or performer.
When setup, contracts can be emailed to your chosen Licensor for completion online. Licensors will be given a unique login and password where they are able to sign in to a special Licensors section of your ampsuite account, fill in their details (Name, Address, Website links etc) and sign off on any Contracts you have open with them. The licensor creates a legally binding contract by filling in their details, signing their name and ticking a box - and that's it. It is important that you have already correctly listed your Licensors before attempting to send contracts, you should ensure that each Licensor you wish to send a contract has a valid email address listed beforehand.
Let's get started!
Creating a New Contract
If the artist or licensor you wish to send a contract too already exists on ampsuite, simply select them from within the licensors screen.
If they do not exist you will need to create them first. You can do this from the licensors screen - see Creating External Licensors under the licensors screen section of the help guide. Make sure 'Link to Artist' is set to 'Yes' when doing this if you want the artist associated with the licensor to be available to use on releases/tracks. Make sure that the Licensor has a valid email address as this is where the contract will be sent for signing.
Once the Licensor has been created /selected you can either create a new contract for the licensor (or you can use an existing one where appropriate) - see the contracts section of the help guide on how to set up a new contract for a licensor.
Contract Text
Once you have defined the details and percentages of your Contract on the Contract Details tab, you will want to click on the Contract Text tab - this is what you Licensor will be reading before they sign the contract.
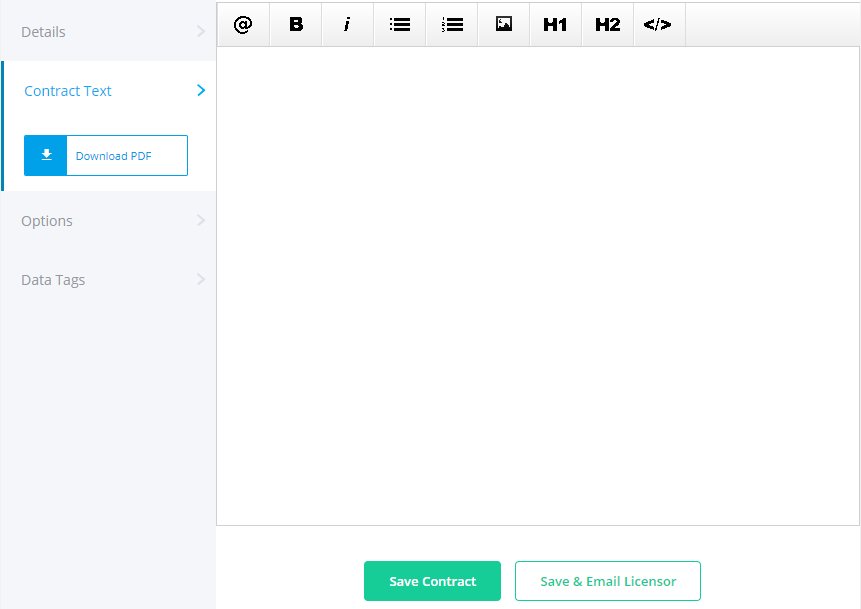
Note that nothing under the Contract Details tab will be shared with your Licensors automatically, so you will also need to explicitly state the terms in writing of each contract under the Contract Text tab.
You can set the text here for your contract in the text editor on the right. This means that what you see and how you see it in the editor will be exactly how your Licensors will see the contract text before signing.
While writing your contract text, you may find the following tools of use:
- '@': inserts a data tag within the text. See the following section for information on using data tags within your text.
- 'B': makes the selected text Bold.
- 'I': makes the selected text Italic.
- Lists: You can also create a bullet-list or a numbered-list with the two list buttons.
- Images: With the photo frame button, you are able to upload and insert a graphic into your guide with the photo frame button. This is useful if you need to include your company's logo or a predetermined signature - saving you the time of printing out and signing the contract by hand. For image uploads, it's best to stick to RGB images at no more than 72dpi or you will unnecessarily increase the file-size of your contracts.
- Headings: The H1 and H2 buttons allow you to create headings (H1 being a primary heading, H2 being secondary). When your contract is complete you can export it as a .pdf and these headings will make up the different segments of the document.
Editing Tips
- You can cut & paste your contract text from a Microsoft Word document (or similar) into the contract text box. Basic formatting such as headings and alignment should be copied along with the text, although this may vary between different versions and programs. You should check the formatting of your entire text before sending it out to any licensors.
- For areas of your contract text which you cannot predetermine such as Licensor name, postal address and their signature (amongst others), you can use Data Tags as variables (similar to a mail merge) to customise each contract to each specific Licensor you issue to. You can read more about this in the Data Tags. section below.
- You might wish to refer to recordings within your contract text as 'listed hereunder' or similar - when you create a unique contract for your Licensor you will be required to define the details of each recording covered, which are then included at the end of the document.
- You can use the buttons at the top of the Contract Text tab to format your text, including adding bold / italics, headings, bullet point lists and upload images (such as signatures and logos).
If you wish to save your contract text without emailing it to the licensor just yet click the Save Contract button at the bottom of the form.
You will also need to complete the Track Details tab (see below) before sending out your contract, once all sections of the contract have been completed you can click the Save & Email Licensor button on the Contract Text tab to send the contract out for your licensor to sign.
Track Details
You must add the details of any tracks associated with the contract under the Track Details tab of the contract dialog. Note that these are not 'real' tracks within ampsuite (which must be added to a release) but just placeholder details to be displayed within the contract text.
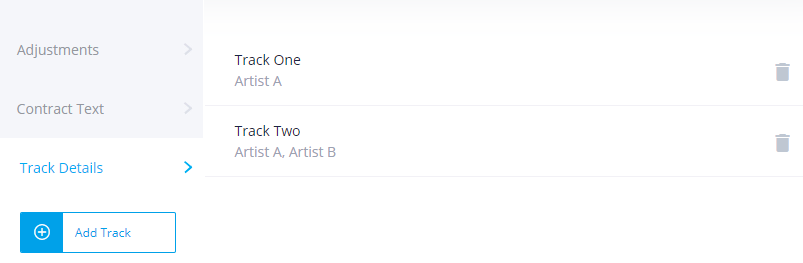
Click the Add Track button under the Track Details tab (shown above) to create a listing for each track you intend to be covered by this contract. Your Licensors will have the opportunity to confirm these are listed correctly before signing.
If you do not fill in the 'Written' and 'Produced' by fields, the Licensor will be requested to fill these in themselves before signing the contract. This might be useful when you are unsure of the complete writing and production details required for each track which you are signing.
As a minimum you must enter at least the track title and artist(s) for each track.
Data Tags
The final tab on the Contract dialog is for Data Tags, which allow you to gather data from a Licensor for inclusion in a contract.
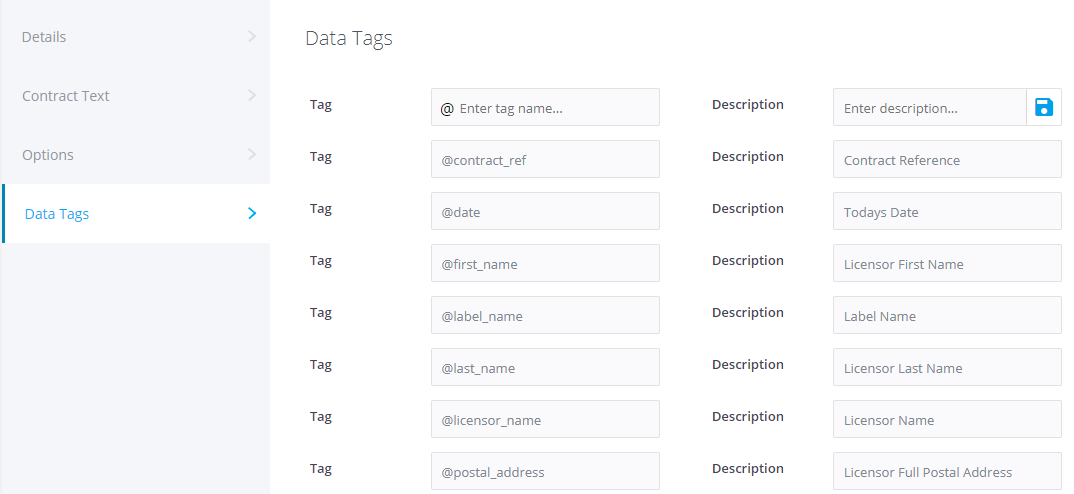
Some default data tags are predefined in ampsuite for information which is entered for each contract, such as the date, licensors name and address details. You can also define your own tags to gather data from the person signing the contract, these free text tags can be whatever you wish.
Licensors are asked to enter the appropriate text for the custom Data Tags inside a pop-up box before they are able to read the contract, so do ensure that your tags will make sense and the licensor will know what to put in them.
You can make reference to a Data Tag within your contract text using the '@' symbol followed by the tag name you define in this tab, or clicking on the @ button from the top menu on the Contract Text tab and selecting the tag you wish to use.
Default Data Tags:
- Date (@date): the date that the contract is being accessed on.
- Contract Reference (@contract_ref): the unique reference number given to each individual contract by ampsuite.
- Licensor First Name (@first_name) and Last Night (@last_name): the first and last names of your Licensor.
- Licensor Name (@licensor_name): the name of the Licensor this specific contract is listed under.
- Licensor Postal Address (@postal_address): the full postal address of your Licensor.
- Licensor Signature (@signature): this will fill in the digital-signature created for your Licensors when they agree to the terms of the contract. Upon agreeing, a digital signature is created which makes the contract legally-binding.
Custom Data Tag example usages:
Should these tags not be enough to customise your contracts, you can create custom Data Tags within this tab. At the top of the screen, enter a Tag name and Description for your new custom tag. Click the save button on the right of the Description to create the new tag.
NOTE: You don't need to include a Custom Data Tag for Artist Name or Track Titles, these can be referred to in the contract text as being 'listed hereunder' should you choose to refer to them. Each contract will contain a box at the end of the contract text which details the Artist name and Track Titles that the contract refers to.
Custom Data Tags only need to be added once as they have a global availability.
To delete a Data Tag you may need to contact your ampsuite representative, so be careful about adding tags you might not need!
Sending a Contract
Before sending out a contract make sure that the email listed in the Licensor listing is correct.
When you're happy with the contract you've created, press the Save and Email Licensor button on the Contract Text tab.
The Licensor will receive an email in their inbox with a unique username and password which they are able to use to login to a special Licensor-restricted section within your ampsuite account.
If you have listed any details within the Artists or Licensors section relating to that Licensor (for example, postal address, country or social media links) - these will be visible to the Licensor when they login, they will also be able to update these and make changes. So if you have entered their Facebook link incorrectly or a licensor chooses to pick a new Twitter handle, they can update it and save changes through this unique Licensor-restricted section to keep your records up to date.
Every field visible in the Artists section is reflected in this Licensor-restricted view - in addition to the ability to update their passwords.
The username given will be the Licensors email. The randomly generated password can be changed once your Licensor has logged in.
If your Licensor changes and then forgets their password they can use the 'Forgot password? click here to reset it.' link on the ampsuite system login page (Note this is only for resetting licensor passwords, it can not be used to reset the password of ampsuite admin users).
Licensors must enter in their information before they are able to see and sign the contract, ensuring that postal address and all other Data Tags required are generated and included in the contract text.
Once filled in, the Licensor will be able to click through to read and sign the contract in question.
Your Licensor will be able to read the contract before signing. At the bottom of the page is a list of the track details included and the ability to create a legally binding electronic signature.
Licensors must type their full name, account password and declare whether they agree or do not agree to the terms of the contract via tick box before a 'sign contract' button will appear. If they do not agree, no button will appear.
Once submitted, a digital-signature will be applied to the contract and a notification will appear within your ampsuite account letting you know that the contract has been signed.
Receiving a Contract
Once the Licensor has signed and submitted their contract, a notification will appear in your Inbox - you can access your inbox from any page by clicking the envelope icon shown in the top right of any screen.
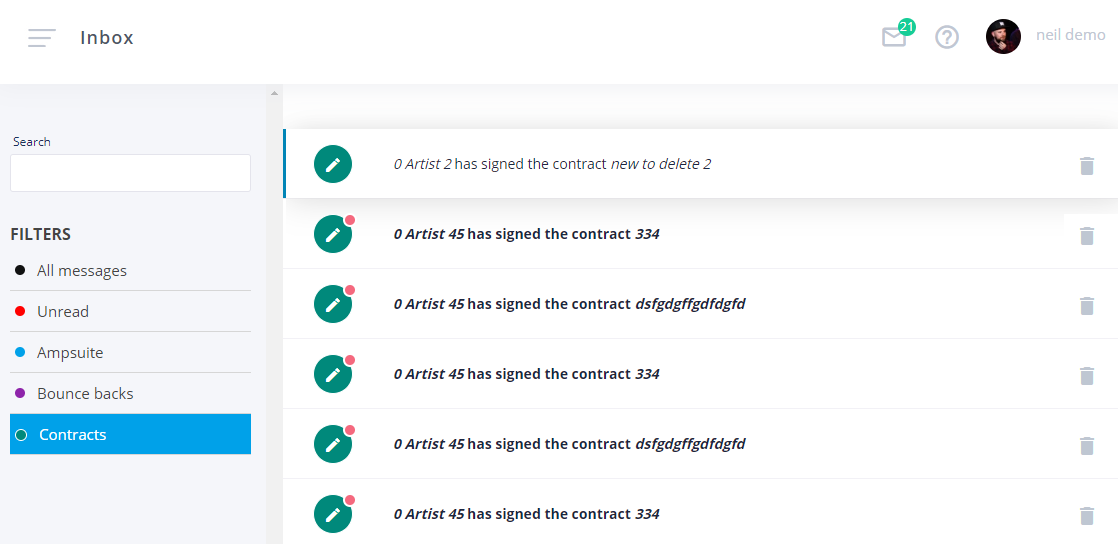
When you click on an Inbox notification you can choose to either:
- See the read-only version of the contract in your browser,
- Download a PDF version of the contract
- Create a new Release from this contract (see below for details)
This Inbox is sorted by read-status (unread notifications will stay at the top), not by date - so you can be confident that any unread notifications of signed contracts will always be highlighted at the top of this screen.
Once you have confirmed that you no longer require an Inbox notification for a contract, you can click the trash can icon to the right of each notification to delete the message.
IMPORTANT
If you are using the data feeds from ampsuite to power your website, you will have to manually confirm changes made by your Licensors once they have signed their contracts through the Licensor-restricted section.
You should double-check the biography, external links and artist photo once a contract has been submitted as changes made by the Licensor will be linked to the Artist feed live on your website.
Creating a Release from a Contract
Selecting the Create Release option from the Inbox message (detailed above) will create a new release, with details such as the release title, artist, written by and produced by fields filled in from the first track associated with the contract.
Once the release details are completed and saved, you can add tracks to the release in the usual way by clicking the Add new track button under the Tracks tab of the release.
An additional dropdown will appear at the top of the Track Details form, labelled Use Contract Details. Using this dropdown you can select one of the tracks previously entered under the contract text options, and completed by the licensor, to automatically pull details from into the form. Select the track details you wish to use and click the + button to the right of the dropdown to populate the details in to the form.
You will also notice that the Licensor & Contract dropdowns on the Contracts tab are preselected to match the contract the release is being created from.
IMPORTANT: If royalties from the track are to be split between multiple Licensors you must make sure to manually add any additional licensors/contracts here and adjust the contract percentages accordingly.
You must click the Save Track button at the bottom of the form as usual to save these details, you may need to enter any missing mandatory track details not present on the contract before saving.